test today

From Bookworm to Book Nook Master
Welcome to the enchanting world of book nooks! If you've ever dreamed of creating tiny, magical worlds that nestle perfectly between your favorite novels, you're about to embark on one of the most rewarding crafting journeys available today. Book nook kits offer the perfect blend of creativity, mindfulness, and stunning home décor that transforms any bookshelf into a gateway to miniature wonder.
Whether you're seeking a calming weekend project, looking for a unique gift, or wanting to add personality to your reading space, this comprehensive guide will walk you through everything you need to know to become a confident book nook builder.
What Exactly Are Book Nooks?
Book nooks are miniature dioramas designed to fit perfectly between books on your shelf, creating the illusion of a secret world hidden within your library. These captivating scenes typically measure about 7-9 inches tall and feature intricate details, warm LED lighting, and themes ranging from cozy bookstores to mystical alleyways.
Key Features
- Pre-cut wooden pieces
- Built-in LED lighting
- Detailed instruction manuals
- No power outlet required
- Perfect bookshelf fit
Benefits
- Stress-relieving activity
- Develops fine motor skills
- Creates unique home décor
- Screen-free entertainment
- Sense of achievement
Choosing Your Perfect First Kit
Selecting your first book nook kit is an exciting decision that sets the tone for your entire crafting experience. The key is finding the perfect balance between your skill level, personal interests, and available time. Here's what to consider:
Complexity Level
Start with 200-300 pieces for your first build to ensure an enjoyable experience without overwhelming detail.
Theme Appeal
Choose a scene that resonates with you - cozy shops, magical alleys, or vintage stations all offer unique charm.
Time Investment
Plan for 4-6 hours of assembly time spread across several sessions for the most relaxing experience.
Top Beginner-Friendly Recommendations
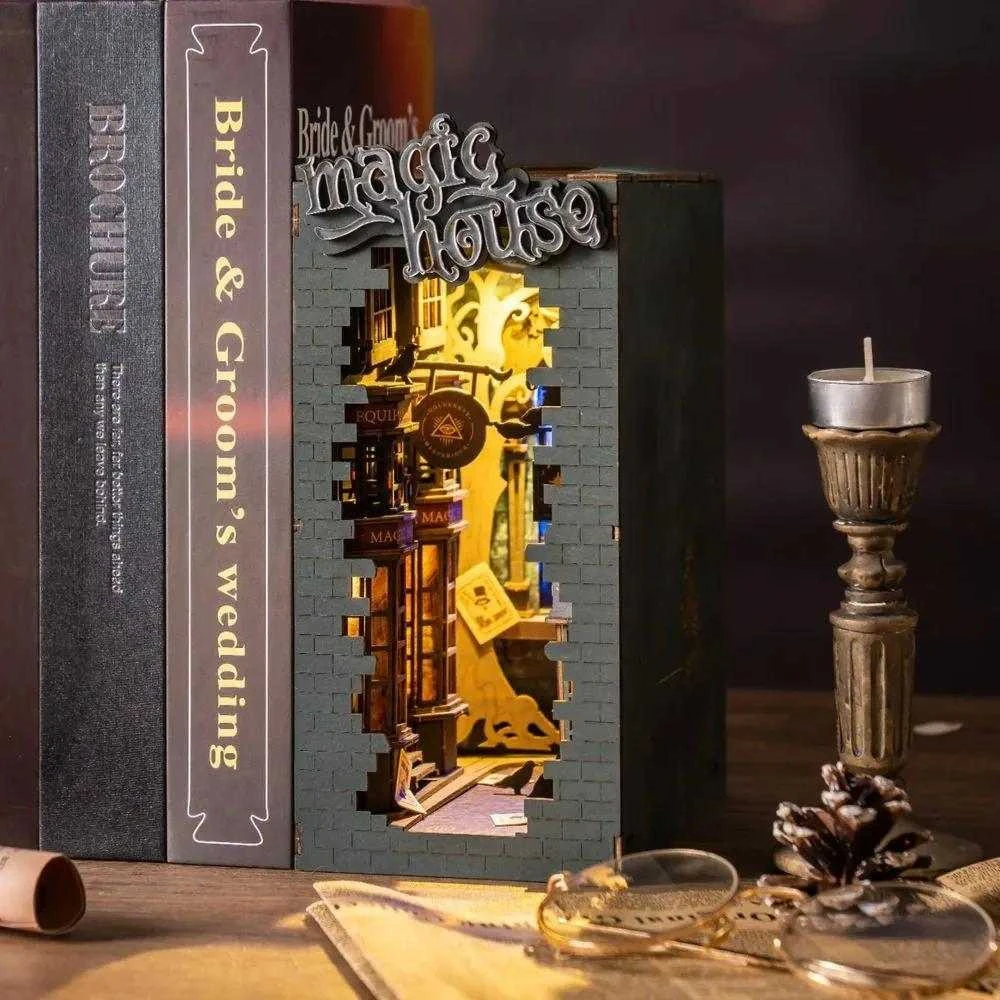
Magic House Book Nook Kit
Perfect for beginners who love mystical themes. This enchanting alley scene features charming shops, warm lighting, and manageable complexity that builds confidence while creating stunning results.
Shop Now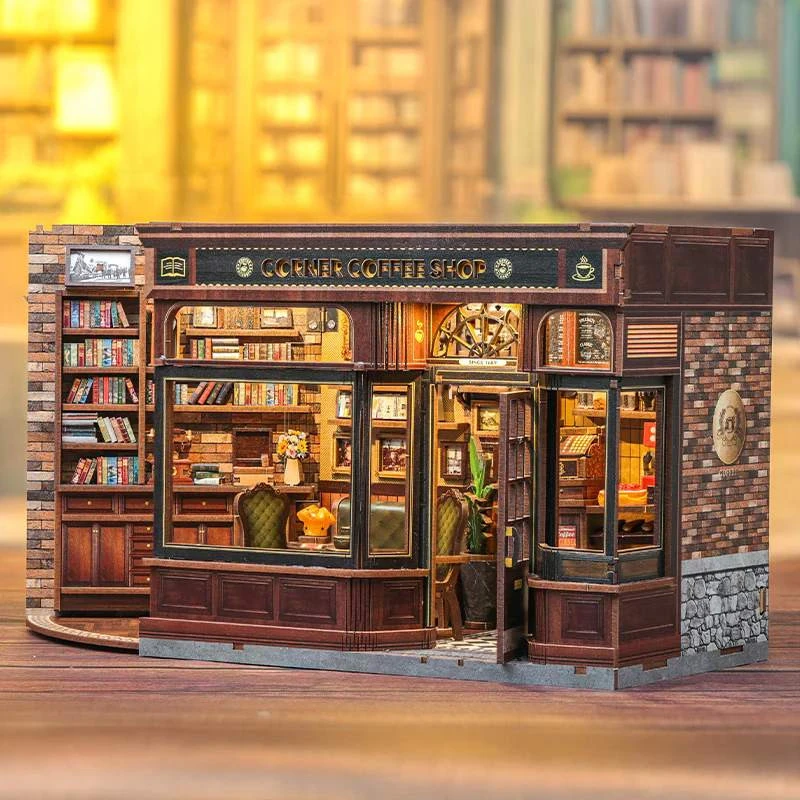
Sunshine Town Book Nook Kit
Ideal for those who appreciate European charm. This sunlit street scene features a cozy bookstore, quaint coffee shop, and elegant clock tower that creates a peaceful, welcoming atmosphere.
Shop Now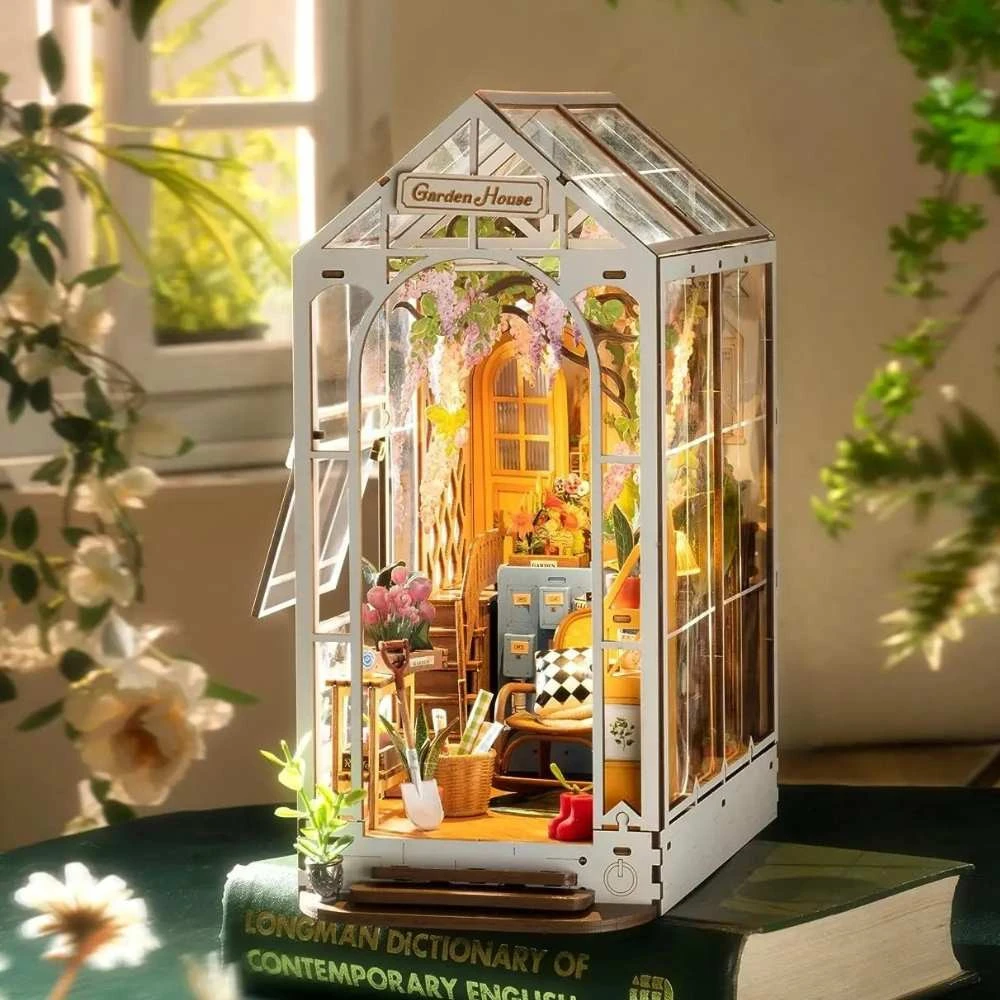
Time Travel Book Nook Kit
Perfect for train enthusiasts and vintage lovers. This nostalgic railway scene captures the romance of steam travel with a beautifully detailed locomotive and classic station platform.
Shop NowEssential Tools & Workspace Setup
What You’ll Need
- Craft Glue: Quick-drying white glue or wood glue works best. Avoid super glue for beginners.
- 2 AAA Batteries: For powering the LED lighting system (not included in kits).
- Precision Tweezers: Essential for handling small pieces and placing delicate details.
- Magnifying Glass: Optional but helpful for reading small numbers and fine detail work.
Workspace Tips
- Good Lighting: Work near a window during the day or use a bright desk lamp to avoid eye strain.
- Organized Surface: Use small bowls or compartments to sort pieces by size and keep your workspace tidy.
- Comfortable Seating: Choose a chair with good back support since you'll be sitting for extended periods.
- Distraction-Free Zone: Create a peaceful environment where you can focus and enjoy the meditative process.
Your First Build: Step-by-Step Process
- Unboxing & Inventory: Carefully remove all pieces and lay them out. Check each piece against the parts list to ensure nothing is missing.
- Study the Instructions: Read through the entire instruction manual once before starting. Familiarize yourself with the symbols and numbering system used.
- Start with the Foundation: Begin with the base structure and walls. These larger pieces are easier to handle and help you get comfortable with the assembly process.
- Add Details Gradually: Work from largest to smallest pieces, adding furniture, decorations, and tiny details last.
- Install Lighting System: Carefully thread the LED wires through designated holes and test the lighting before final assembly.
Common Challenges & Solutions
- Pieces Don’t Fit: Sometimes pieces may seem too tight or misaligned. Check piece numbers carefully and gently sand rough edges if needed.
- LED Lights Not Working: Check battery placement, ensure all connections are secure, and verify wires haven't been damaged.
- Missing Pieces: Double-check your workspace and packaging. Contact Tinktopia’s customer support for replacement parts.
- Taking Too Long: Work in 30-60 minute sessions. Enjoy the process!
Taking Your Skills to the Next Level
- Custom Painting: Add personal touches with acrylic paints to customize colors and create unique weathering effects.
- Additional Details: Source tiny accessories, miniature plants, or dollhouse furniture to enhance your scenes.
- Lighting Upgrades: Experiment with colored LEDs, flickering candle effects, or additional light sources for dramatic ambiance.
- Community & Inspiration: Join online communities of book nook enthusiasts to share creations and get advice.
Ready to Start Your Miniature Adventure?
You now have all the knowledge and confidence needed to create your first stunning book nook. Remember, this journey is about enjoying the process, not rushing to the finish line.
Explore All Kits